

Why Your Brushes Don't Last (And How to Change That)
At Hues Art Supply, one of the most common things we hear is:
"I'm hard on my brushes—they never seem to last very long."
Sometimes that's true. Brushes are tools, and eventually they wear out. But with a few simple habits, most artists can get significantly more life from their favourite brushes.
Whether you paint with watercolours, acrylics, oils, or mixed media, proper brush care will save you money and improve your painting experience.
Help! My Brush Has Gone Feral
When I bought it, it had the most beautiful point. Now it looks like an angry cat's tail that refuses to cooperate.
Sound familiar?
While brushes do eventually wear out, many lose their shape because of a handful of common and completely preventable mistakes:
*Letting paint dry in the ferrule (the metal part that holds the bristles)
*Leaving brushes standing in water
*Using hot water when cleaning
*Scrubbing aggressively against the bottom of a container
*Storing brushes before they're completely dry
*Forgetting to clean brushes immediately after using masking fluid
The good news? Most of these problems are easy to avoid.
A few minutes spent cleaning your brushes at the end of a painting session can dramatically extend their life and help them keep the shape they were designed to have.
Whether you paint with watercolours, acrylics, oils, or mixed media, understanding how to properly care for your brushes will save you money and improve your painting experience.
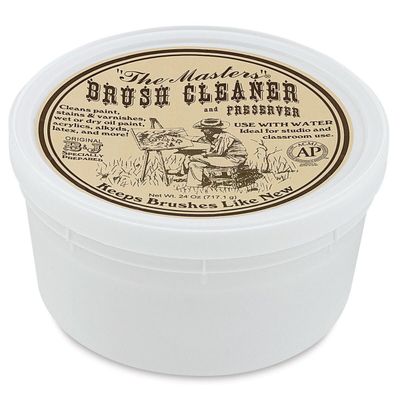
Different brush fibres require slightly different care. Our genuine hog bristle brushes and Kolinsky sable brushes benefit from gentle cleaning and occasional conditioning, while synthetic brushes tend to be more resilient and are particularly popular for acrylic painting. Regardless of the fibre type, proper cleaning and storage will significantly extend the life of your brushes
Cleaning Acrylic Brushes
Acrylic paint dries quickly, making it one of the toughest mediums on brushes. One of the best habits acrylic painters can develop is to remove as much paint as possible from the brush before rinsing it. Wipe excess paint onto a rag or paper towel first, then rinse the brush in water. This simple step removes a surprising amount of paint, keeps your rinse water cleaner, reduces the amount of paint working its way into the ferrule, and means less paint ends up going down the drain.
Best practices:
*Wipe excess paint on rag or paper towel
*Rinse brushes frequently while painting
*Avoid allowing paint to migrate up into the ferrule
*Use a palette knife for mixing colours rather than your brush
*Don't leave brushes sitting in water for extended periods
*Clean thoroughly at the end of every painting session
*Use a brush or dish soap regularly to remove any remaining residue
One of the most common causes of damaged acrylic brushes is using the brush as a mixing tool. Repeatedly grinding paint into the palette pushes paint deep into the ferrule and places unnecessary stress on the bristles.
A palette knife is often a better choice for mixing colours, keeping both your paint mixtures cleaner and your brushes in better condition.
Many artists prefer synthetic brushes for acrylic painting because of their durability and ease of maintenance.
Cleaning Watercolour Brushes
Watercolour brushes are generally easier to clean, but they still benefit from regular care.
*Rinse thoroughly in clean water
*Occasionally wash with brush soap
*Reshape the tip after cleaning
*Allow brushes to dry flat
Watercolour brushes are generally easier to clean, but they still benefit from regular care. A quality watercolour brush can last for many years when properly maintained. Natural hair brushes especially benefit from periodic conditioning with a quality brush soap.
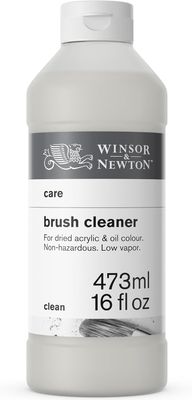
Cleaning Oil Brushes
One of the biggest surprises for new oil painters is that there isn't just one way to clean a brush.
No matter which method you choose, always start by removing as much paint as possible with a rag, paper towel, or scrap newspaper.
Method 1: Oil Cleans Oil
Contrary to what many artists assume, oil paint can often be removed from brushes using oil itself.
Linseed oil, walnut oil, safflower oil, and even vegetable oil can loosen and lift paint from the bristles before a final wash with brush soap.
Pros:
Little to no odor
Gentle on natural hair brushes
Excellent for home studios
Helps condition brush fibres
Cons:
Can be messy
Uses more oil
Requires a final wash with soap
Important Safety Note:
Oil-soaked rags should never be left crumpled in a pile. They require proper handling and disposal because they can pose a spontaneous combustion risk.
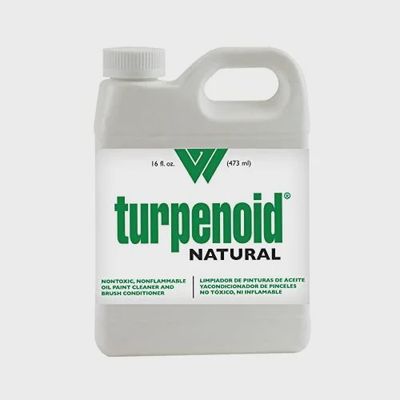
Method 2: Turpenoid Natural
Turpenoid Natural offers a studio safe non toxic lower-odor alternative to traditional solvents.
Pros:
Lower odor (pleasant citrus scent)
Effective on fresh oil paint
Comfortable for smaller studios
Can be used as a paint medium
Cons:
More expensive than simple oil cleaning
Usually requires a final soap wash
Method 3: Gamsol
Traditional solvents remain popular because they clean brushes quickly and efficiently.
Gamsol Odorless Mineral Spirits is one of the most trusted options available.
Pros:
Fast and effective
Excellent for heavy paint buildup
Popular with professional oil painters
Cons:
Requires moderate ventilation
Can dry natural hair brushes over time
Requires proper disposal
Which Method Is Best?
At Hues, we don't believe there's a single correct answer.
Some artists prefer traditional solvents. Others prefer oil-based or low-odor alternatives.
The best system is the one that fits your studio, your comfort level, and your painting practice—and the one you'll use consistently.


Proper Storage Matters
Cleaning is only half the battle.
A clean brush deserves a safe home. Whether you're storing a handful of watercolour brushes or an entire studio collection, proper brush storage helps protect bristles, maintain brush shape, and keeps your favourite tools ready for your next creative session.
[Link to Brush Storage Solutions]
Storage tips:
Allow brushes to dry completely before storing upright
Use brush rolls or protective cases when travelling
Protect brushes from crushing and excessive heat
Avoid:
Storing wet brushes upright
Leaving brushes soaking overnight
Packing brushes into overcrowded containers